Panopto: Recording Video with Panopto Capture
- Tyler Kron-Piatek
Get started recording video with Panopto Capture, the browser-based recorder provided by Panopto. There are two ways to begin a recording with Panopto Capture:
Start Panopto Capture (Add Existing Activities and Insert Stuff)
These steps are also available in Video format. Use the Add Existing Activities Tool to add Panopto videos as an activity in the content area or Insert Stuff Tool to add Panopto video wherever you see the text editor (ex, Module Descriptions, Quiz Questions, D2L Dropbox descriptions, Discussion Descriptions, etc.).
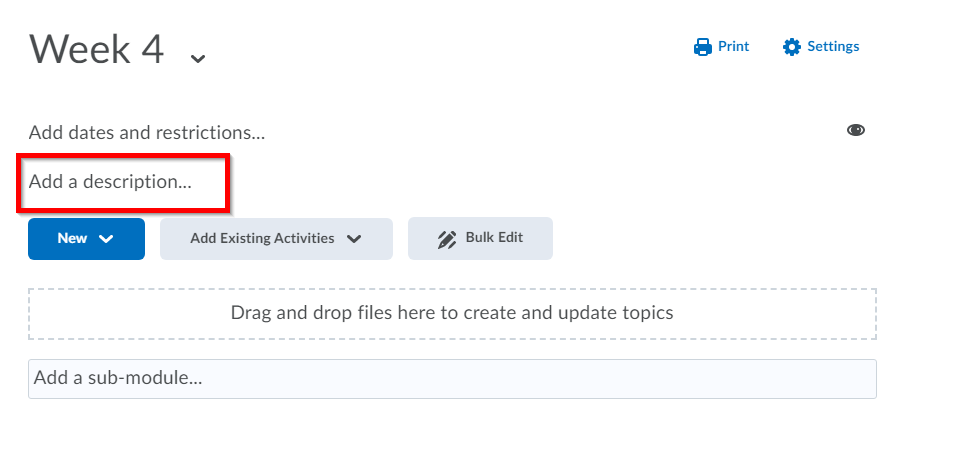
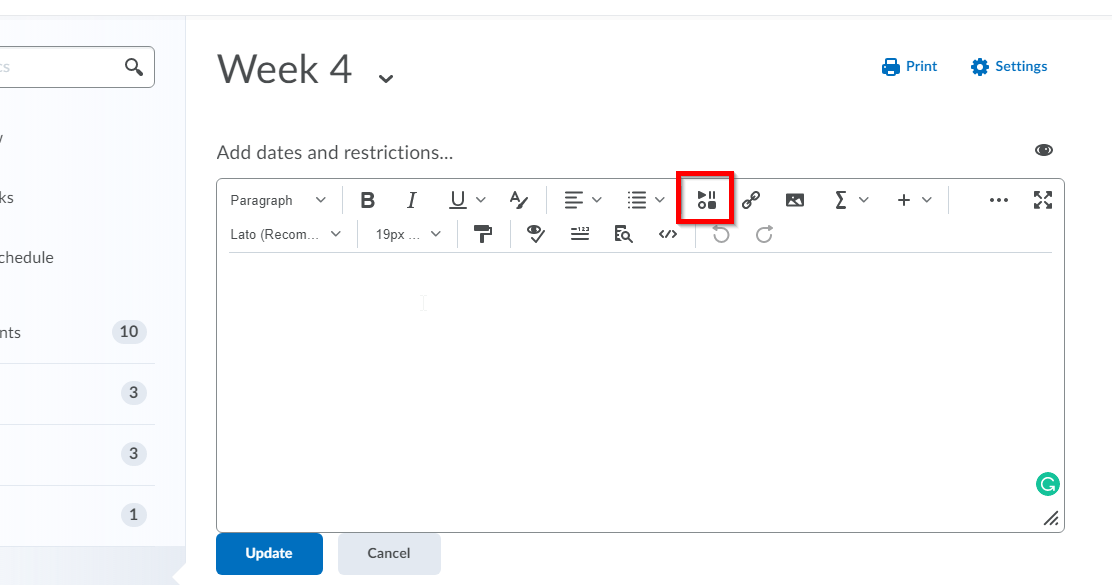
| 1 | In this scenario, we will use the Insert Stuff button to record a video, but the process will be similar if you decide to use Add Existing Activities. Find and click on the Insert Stuff button, which can be found anywhere you can use the HTML Editor. In this case, we will add our new video recording to the Module description (click on "Add a description" when you are in a module). OR find and click on Add Existing Activities. |
|
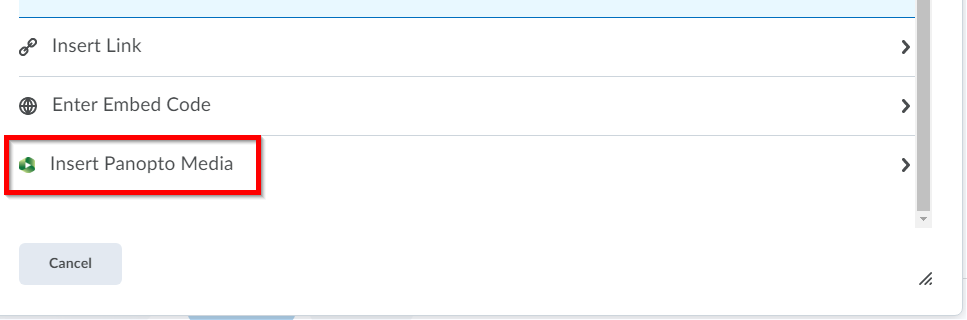
| 2 | Find and click on "Insert Panopto Media" (or "Add Panopto Media" if you are using Add Existing Activities). |
|
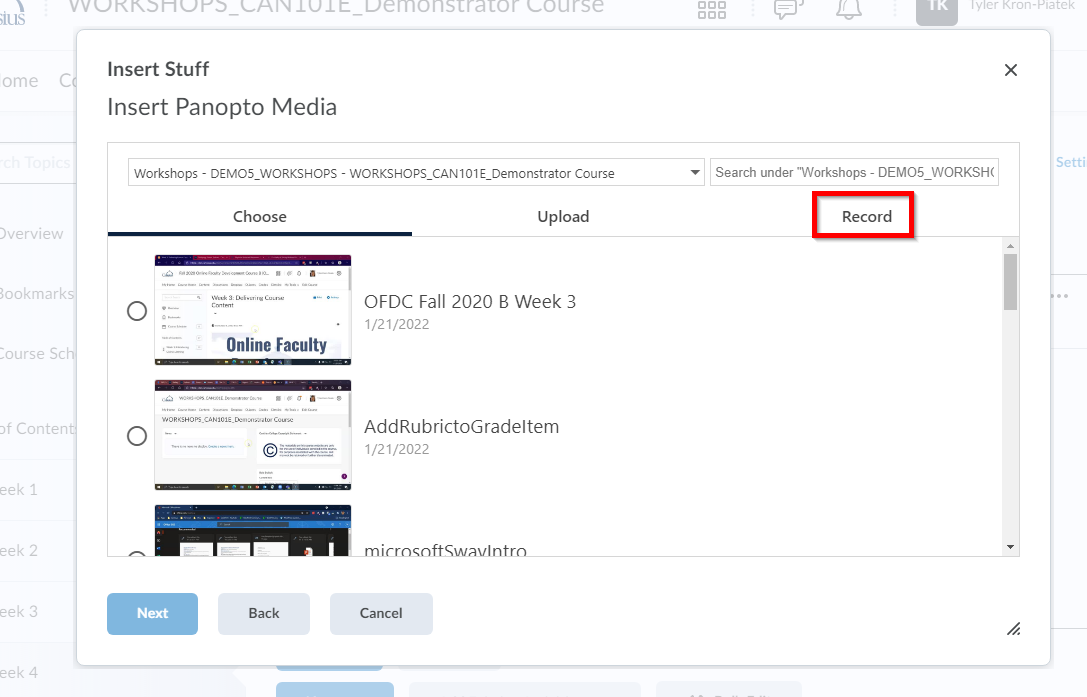
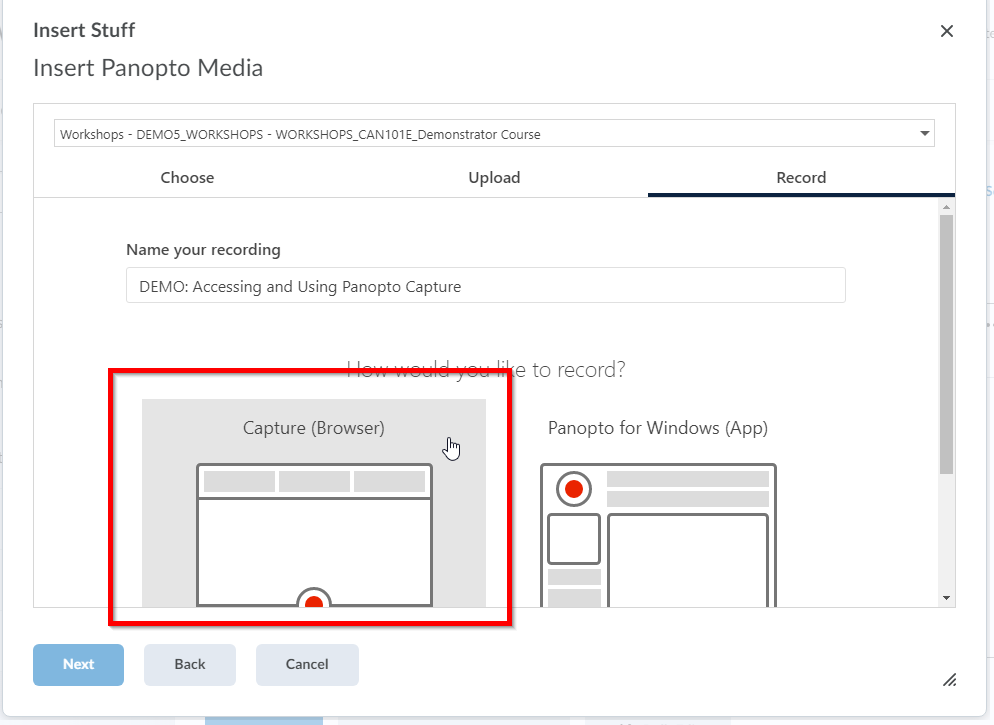
| 3 | Click on the "Record" tab, all the way to the right. |
|
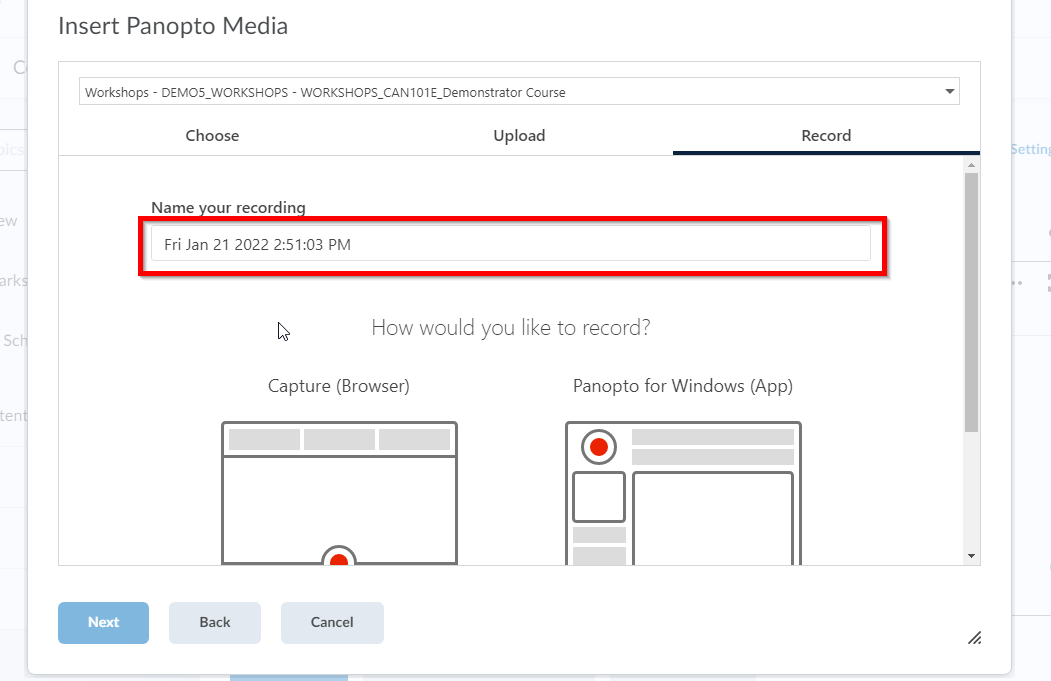
| 4 | Change the name of your recording. |
|
| 5 | Select "Capture (Browser)", the icon on the left. |
|
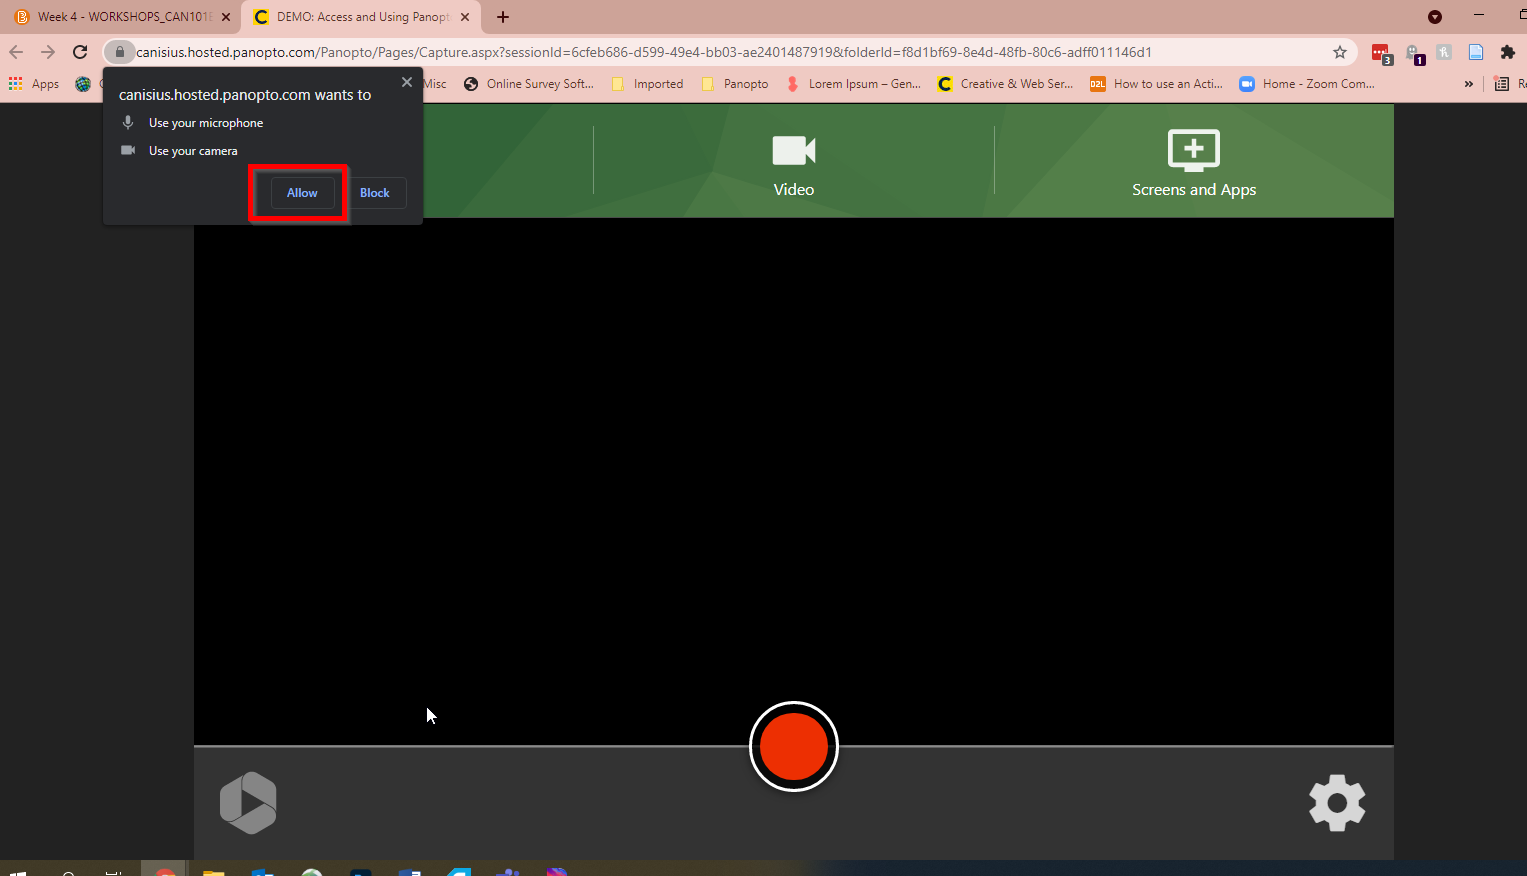
| 6 | Panopto Capture will launch in a new browser tab. Note that you may see a pop-up asking if you want Panopto Capture to access your microphone and camera-- make sure you click "Allow". |
|
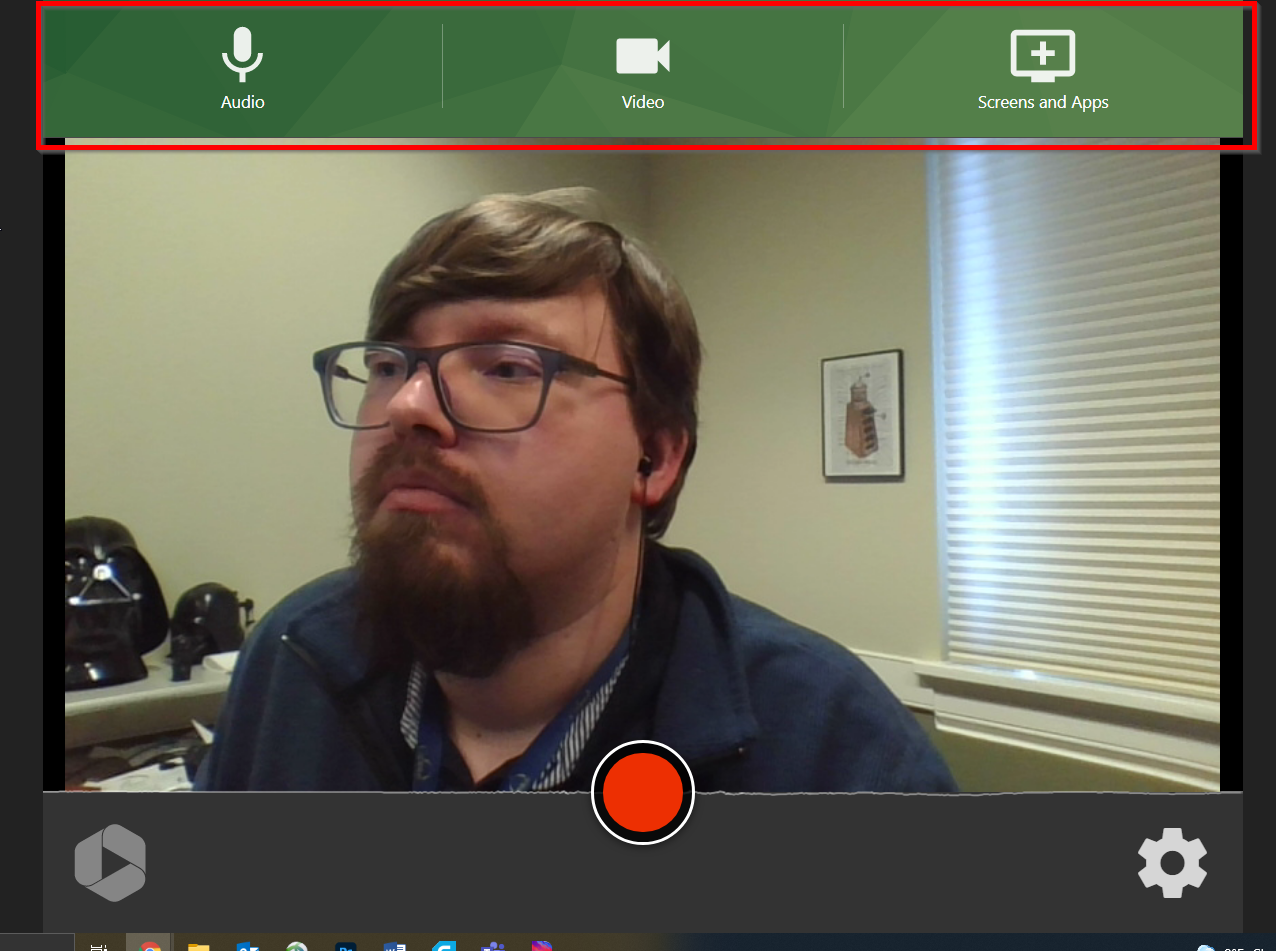
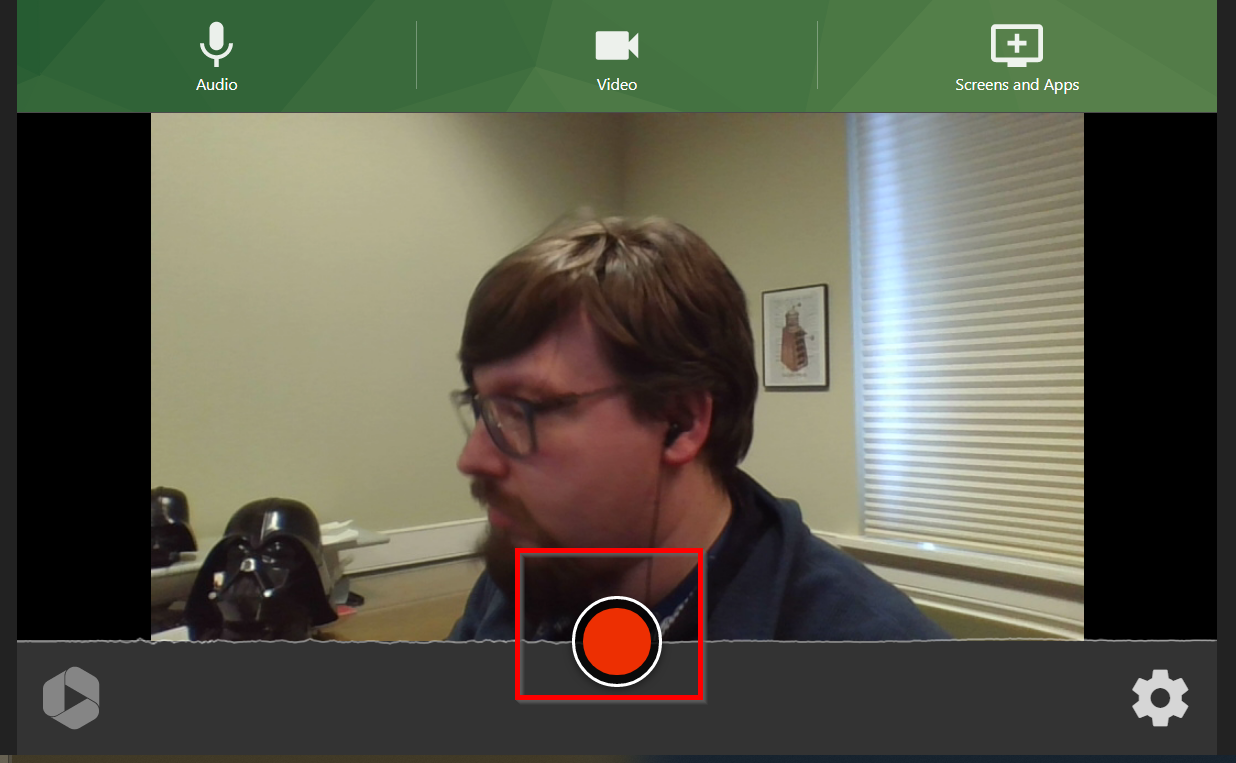
| 7 | At the top, you can choose what Panopto will record. Audio: Choose the Microphone that you want Panopto to use to record your voice. Video: Choose the Webcam that you want Panopto to use to record you. Screens and Apps: If you have multiple screens, you can choose which screens to record. If you have multiple applications or programs running (like PowerPoint, your web browser, etc.), you can choose which programs you want Panopto to record. |
|
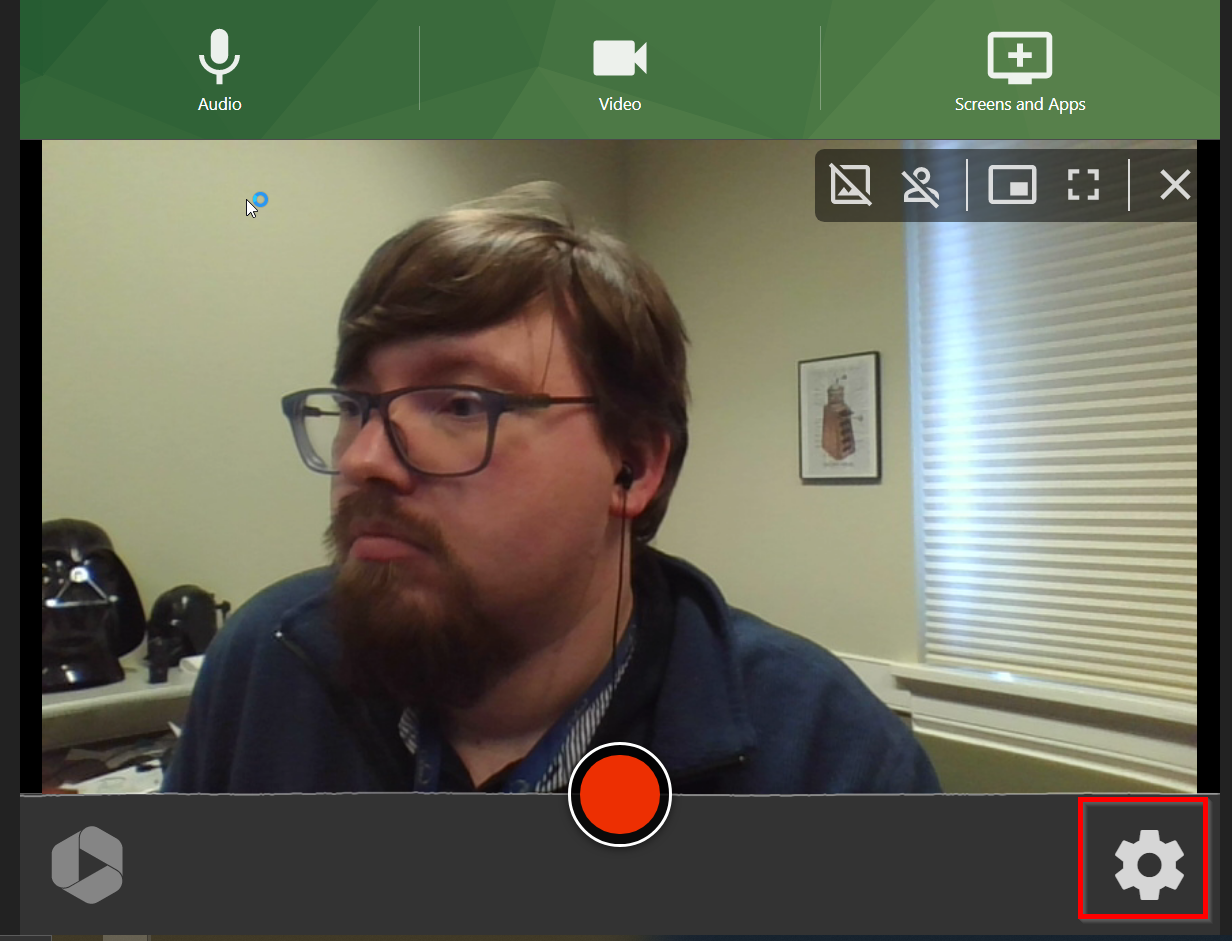
| 7.5 | For other video settings (like video quality, background, etc.), click on the gear icon in the lower-right. |
|
| 8 | To start recording your video, click on the red circle in the bottom center of the screen. You will get a 5-second countdown before the recording starts. To stop the recording, come back to the tab that Panopto Capture is open on and click on the red square. |
|
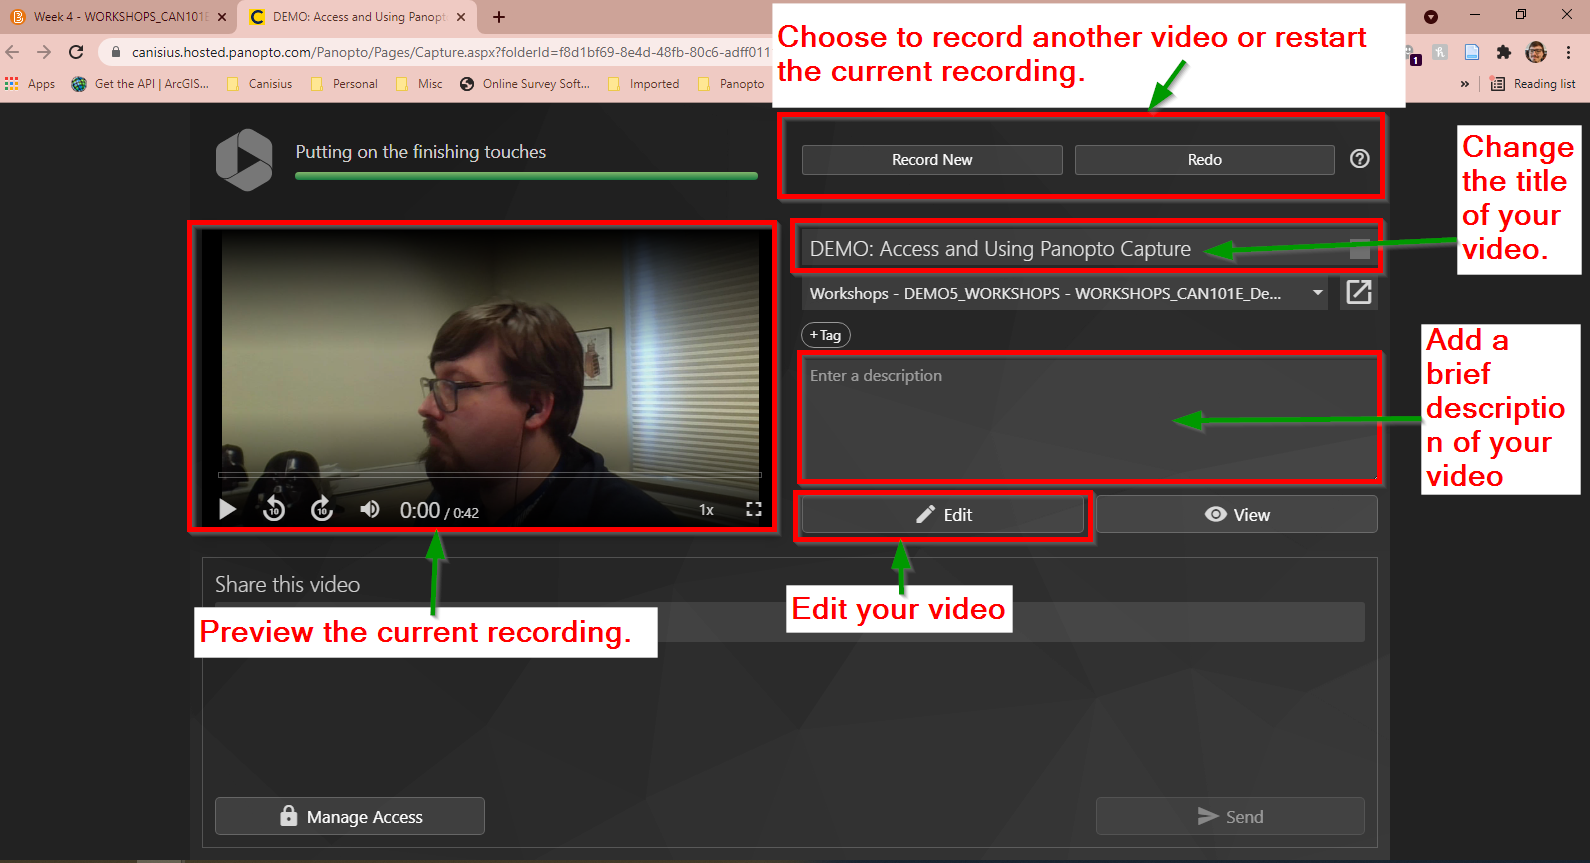
| 9 | When you stop the recording, you will be given a few options including to start a new recording (Record New), restart the current recording from the beginning (Redo), change the title of the recording, enter a description for the recording, and to edit and/or preview your recording. NOTE: You do NOT need to share the video with your students. It will automatically be available to them. See the Using the Panopto Video Editor for more details on editing your video with Panopto. |
|
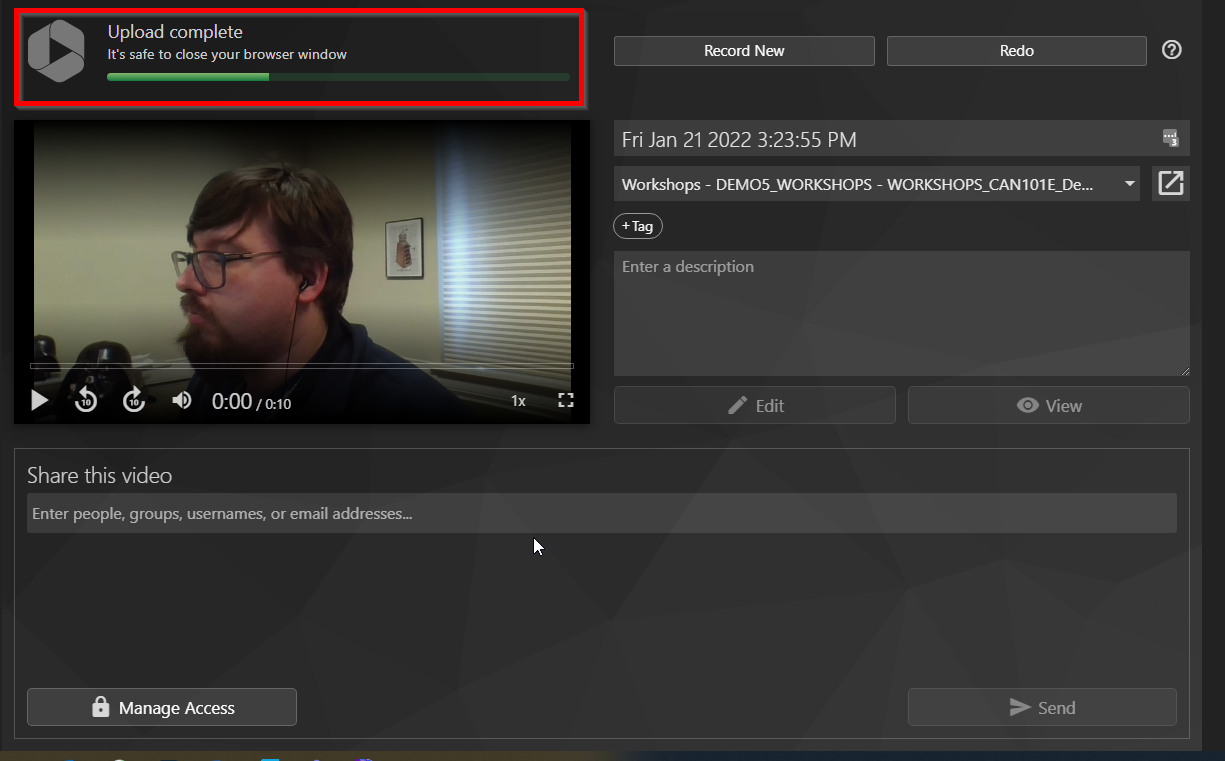
| 10 | Be careful when using Panopto Capture! If you close the browser or tab that the recording is on too fast, your recording may not upload to Panopto. When it is safe to do so, Panopto will provide a message in the upper-left "Upload Complete. It's safe to close your browser window". This message may take longer for longer videos. For shorter videos, you may miss this message altogether-- if you see a message saying "Putting on the finishing touches", you are fine to close the browser or tab that the recorder is on. |
|
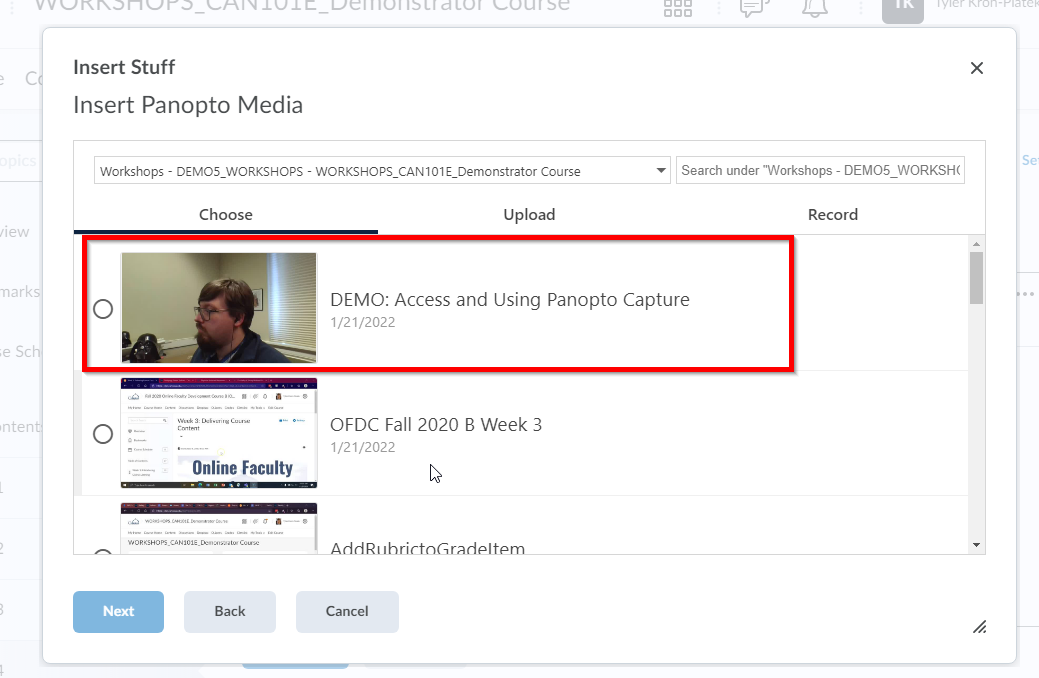
| 11 | To add your newly recorded video, go back to D2L. Unintuitively, your video may not immediately appear in your list when you click on "Choose". Simply click on back in the lower right and then find "Insert Panopto Media"/"Add Panopto Media". Your recorded video(s) should now be in your list and you can insert them. |
|

Start Panopto Capture (Panopto Dashboard)
You can also access Panopto Capture from the Panopto Dashboard. This can be useful if you want to record a video and then edit it later (or review it at a later date) before students see it.
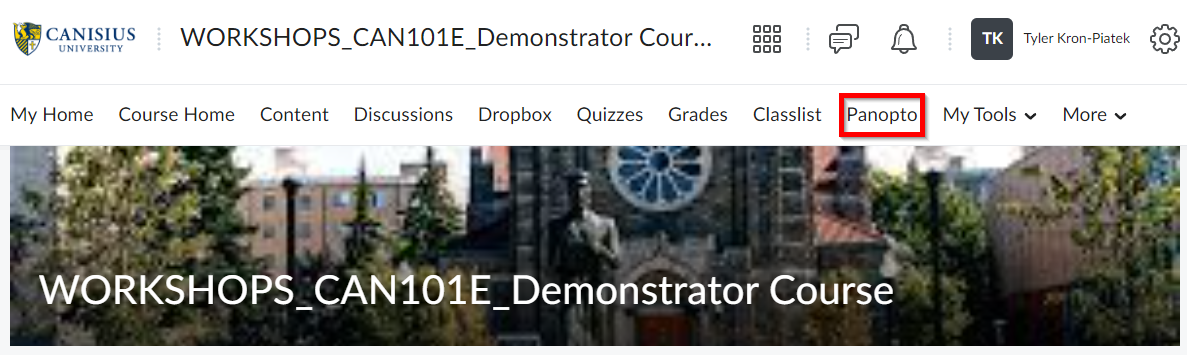
| 1 | Navigate to the course that you want to use Panopto Capture. Then click on Panopto in the course navbar. |
|
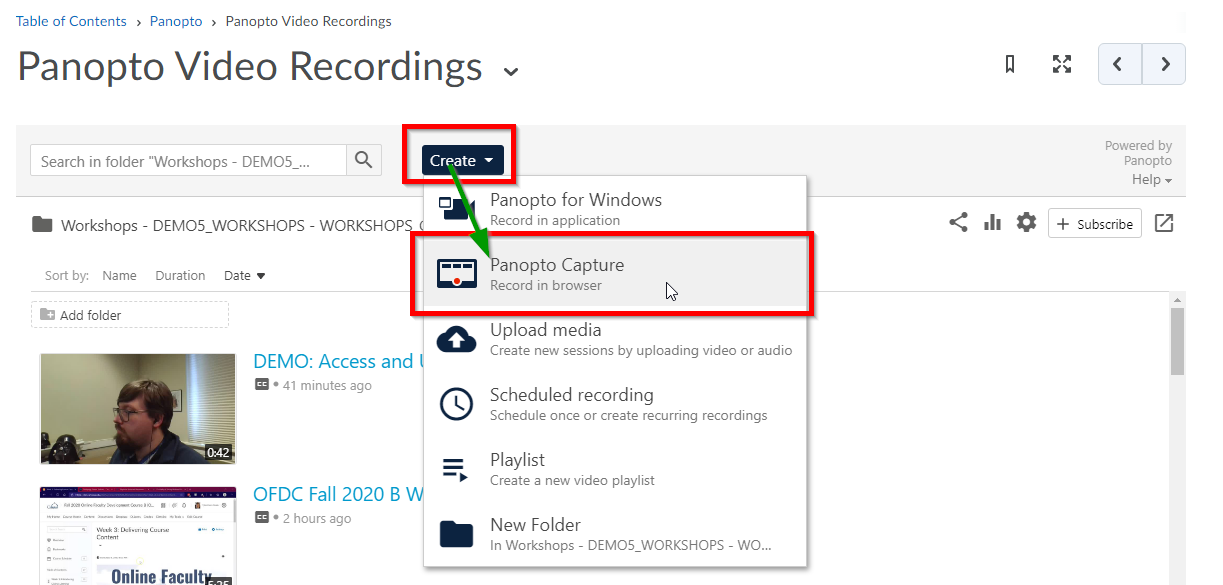
| 2 | Click on Create and choose Panopto Capture from the dropdown menu. |
|
| 3 | Panopto Capture will launch in a new browser tab. Note that you may see a pop-up asking if you want Panopto Capture to access your microphone and camera-- make sure you click "Allow". |
|
| 4 | At the top, you can choose what Panopto will record. Audio: Choose the Microphone that you want Panopto to use to record your voice. Video: Choose the Webcam that you want Panopto to use to record you. Screens and Apps: If you have multiple screens, you can choose which screens to record. If you have multiple applications or programs running (like PowerPoint, your web browser, etc.), you can choose which programs you want Panopto to record. |
|
| 4.5 | For other video settings (like video quality, background, etc.), click on the gear icon in the lower-right. |
|
| 5 | To start recording your video, click on the red circle in the bottom center of the screen. You will get a 5-second countdown before the recording starts. To stop the recording, come back to the tab that Panopto Capture is open on and click on the red square. |
|
| 6 | When you stop the recording, you will be given a few options including to start a new recording (Record New), restart the current recording from the beginning (Redo), change the title of the recording, enter a description for the recording, and to edit and/or preview your recording. If you forget to rename your video, you can always go back and edit it later. NOTE: You do NOT need to share the video with your students. It will automatically be available to them. |
|
| 7 | Be careful when using Panopto Capture! If you close the browser or tab that the recording is on too fast, your recording may not upload to Panopto. When it is safe to do so, Panopto will provide a message in the upper-left "Upload Complete. It's safe to close your browser window". This message may take longer for longer videos. For shorter videos, you may miss this message altogether-- if you see a message saying "Putting on the finishing touches", you are fine to close the browser or tab that the recorder is on. |
|
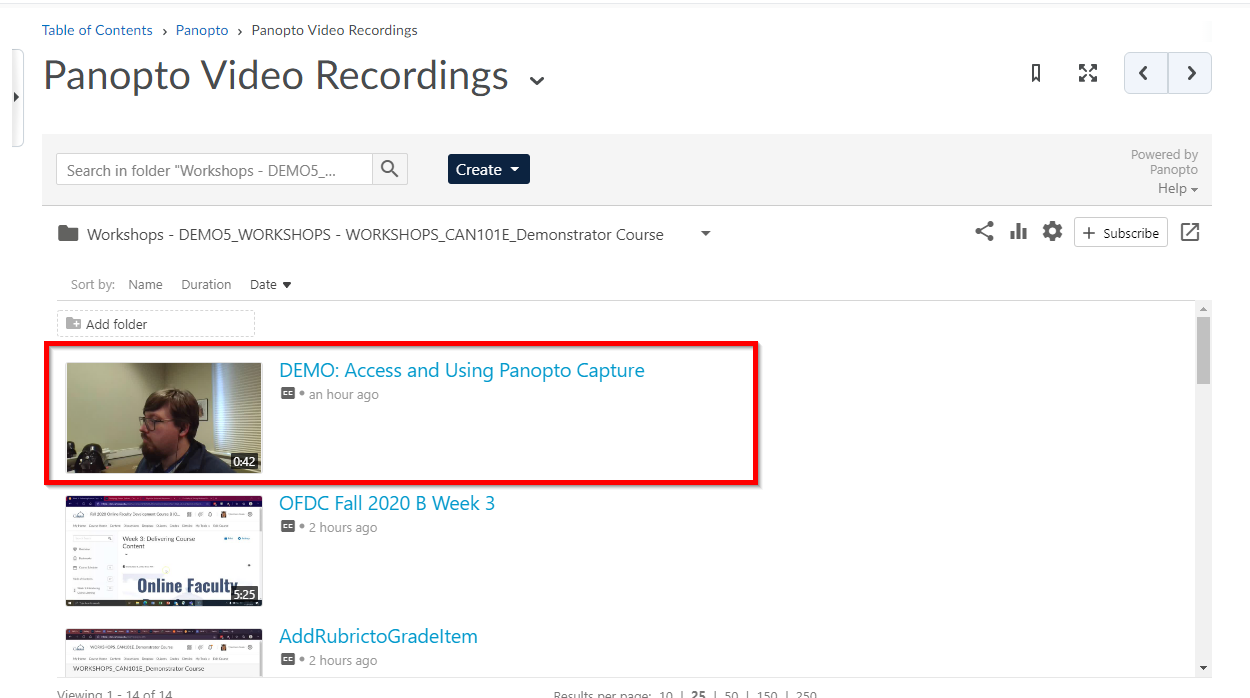
| 8 | Your recording should appear at the top of your list of videos when you go back and visit the Panopto LTI again. If you do not see it, you may need to reload the webpage or wait a few minutes and come back to the Panopto LTI. |
|