After you have connected your laptop with the HDMI cable and selected the laptop input on the Control Panel or with the Remote Control, one additional step might still be required to hear your laptop audio from the room's sound system.
If you have issues using the steps below or are running a different operating system on your laptop than those listed below, please contact the ITS Help Desk at ext. 8340 for assistance.
Windows 11
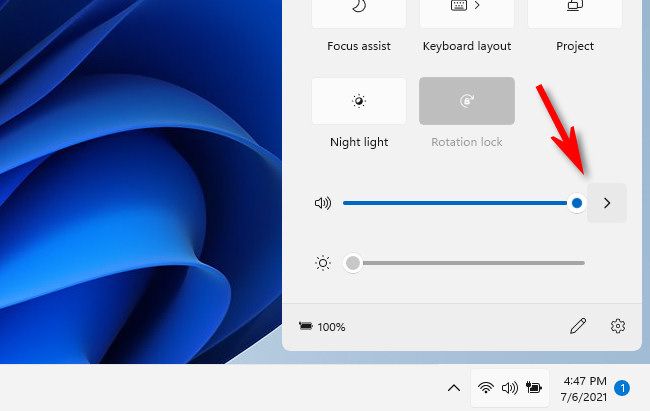
- On the Task Bar, click the Quick settings icon to open the Quick Settings menu by clicking the hidden button around the speaker icon in the lower-right corner of the taskbar.
- In the popup Quick Settings menu, click the sideways arrow (caret) beside the volume slider.
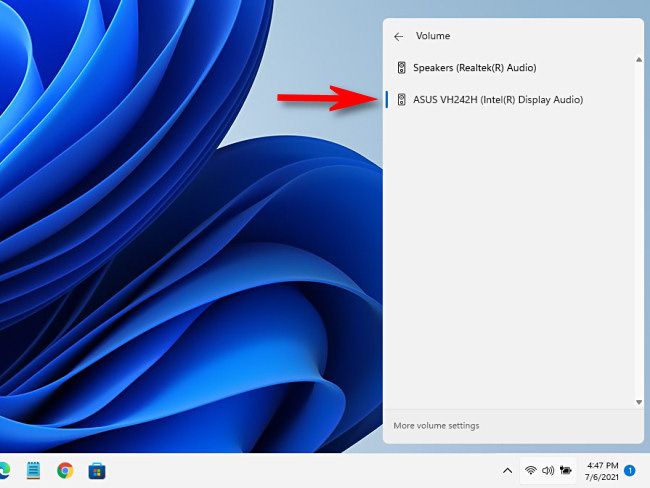
- When you see a list of audio output devices, select the room's system as your output. How this will be labeled depends on the equipment in the room, for example "Extron HDMI" or "Crestron HD audio".
- The volume slider will effect how loud your Laptops sound is, along with the room's volume controls.
Windows 10
- On the Task Bar, Click the Speaker icon on the right hand side.
- In the popup menu, click the name of your current default sound device in the menu.
- From the list, select the room's system as your output. How this will be labeled depends on the equipment in the room, for example "Extron HDMI" or "Crestron HD audio".
- The volume slider will effect how loud your Laptops sound is, along with the room's volume controls.
...


